In order to successfully complete the Diamond Casino Heist in GTA Online, you must first thoroughly scout out the gambling temple. However, the corresponding reconnaissance mission is not that easy and is stingy with specific information about how many access points there are and where they are located.
For this very reason, we will help you in the following lines and list all possible access points.
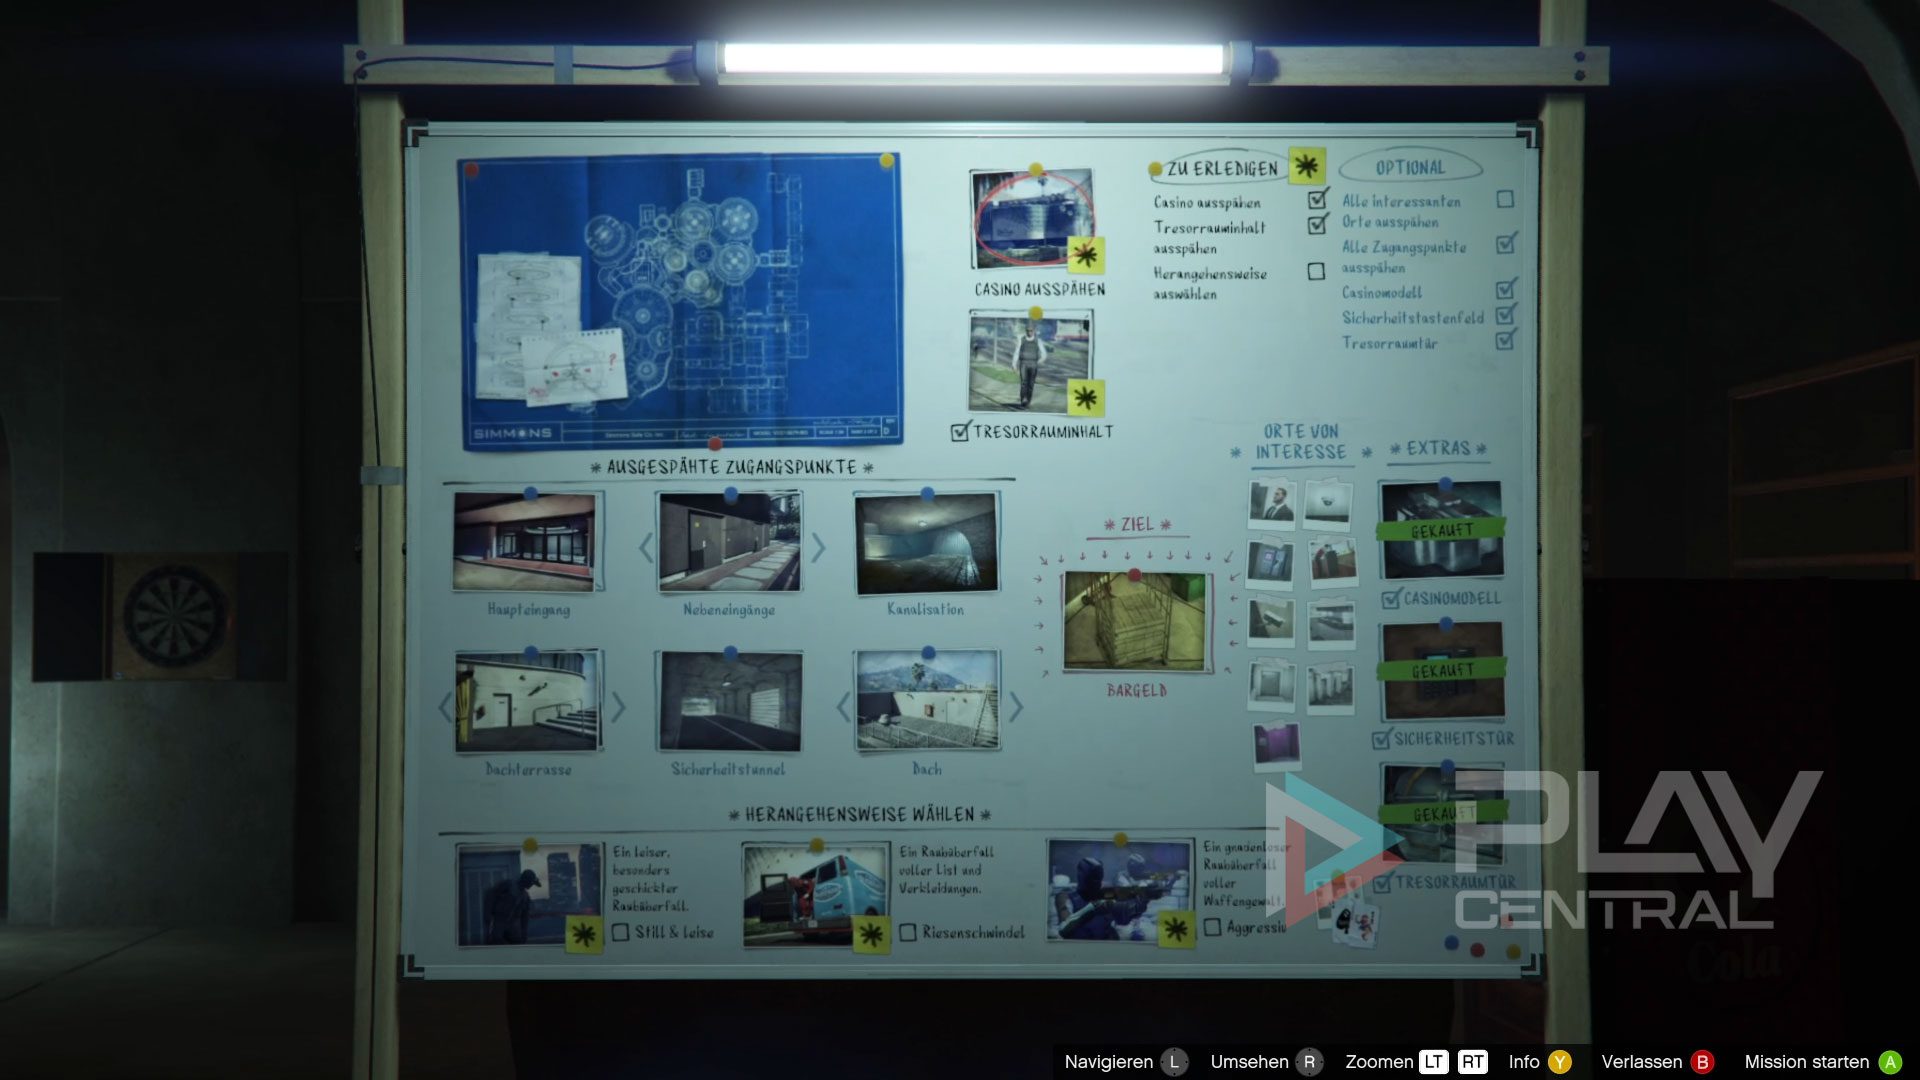
Casino Scope Out
As soon as you own an arcade and have picked up the arcade and planning equipment to complete the preparations, the “Casino Scope Out” reconnaissance mission begins. The aim of this mission is to gather information about the contents of the vault and the casino’s security facilities.
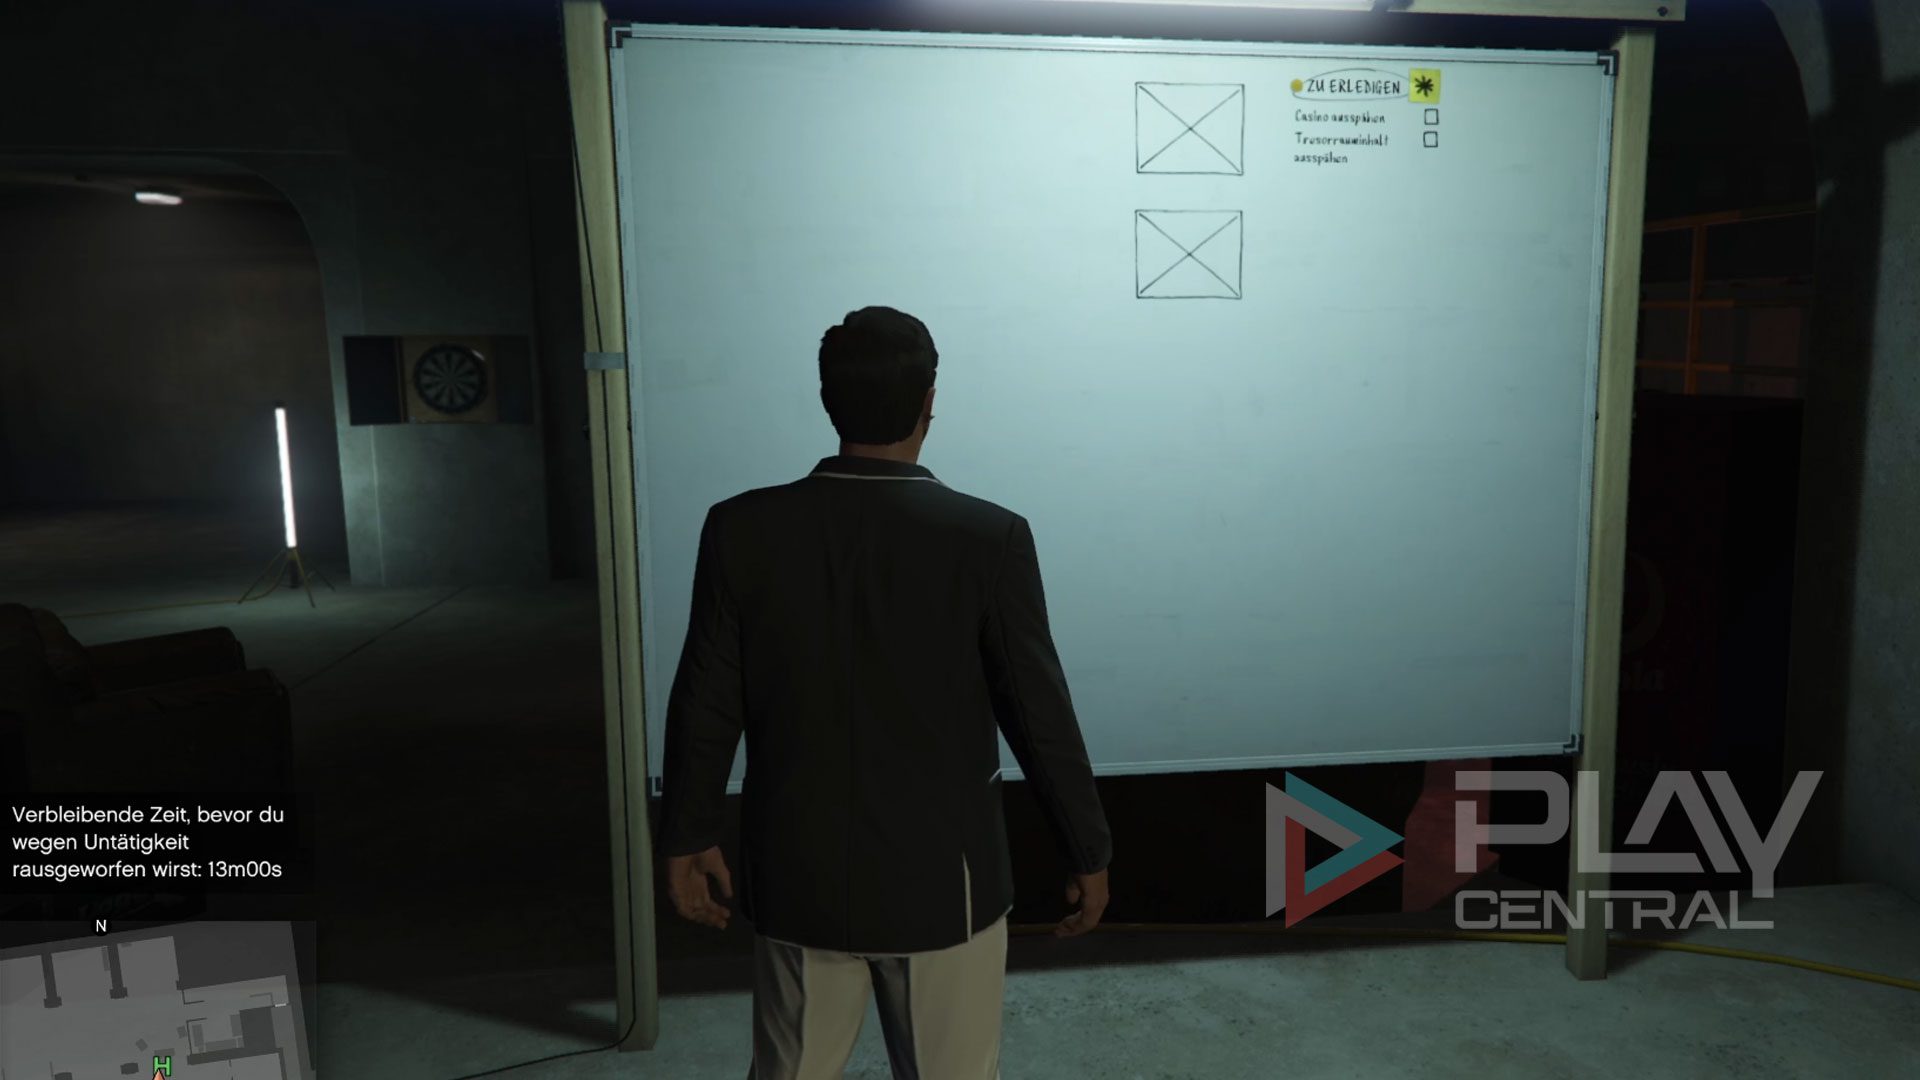
Interact with the preparation board to spy out the casino and complete the setup of the arcade at the same time.
Casino Heist: All access points
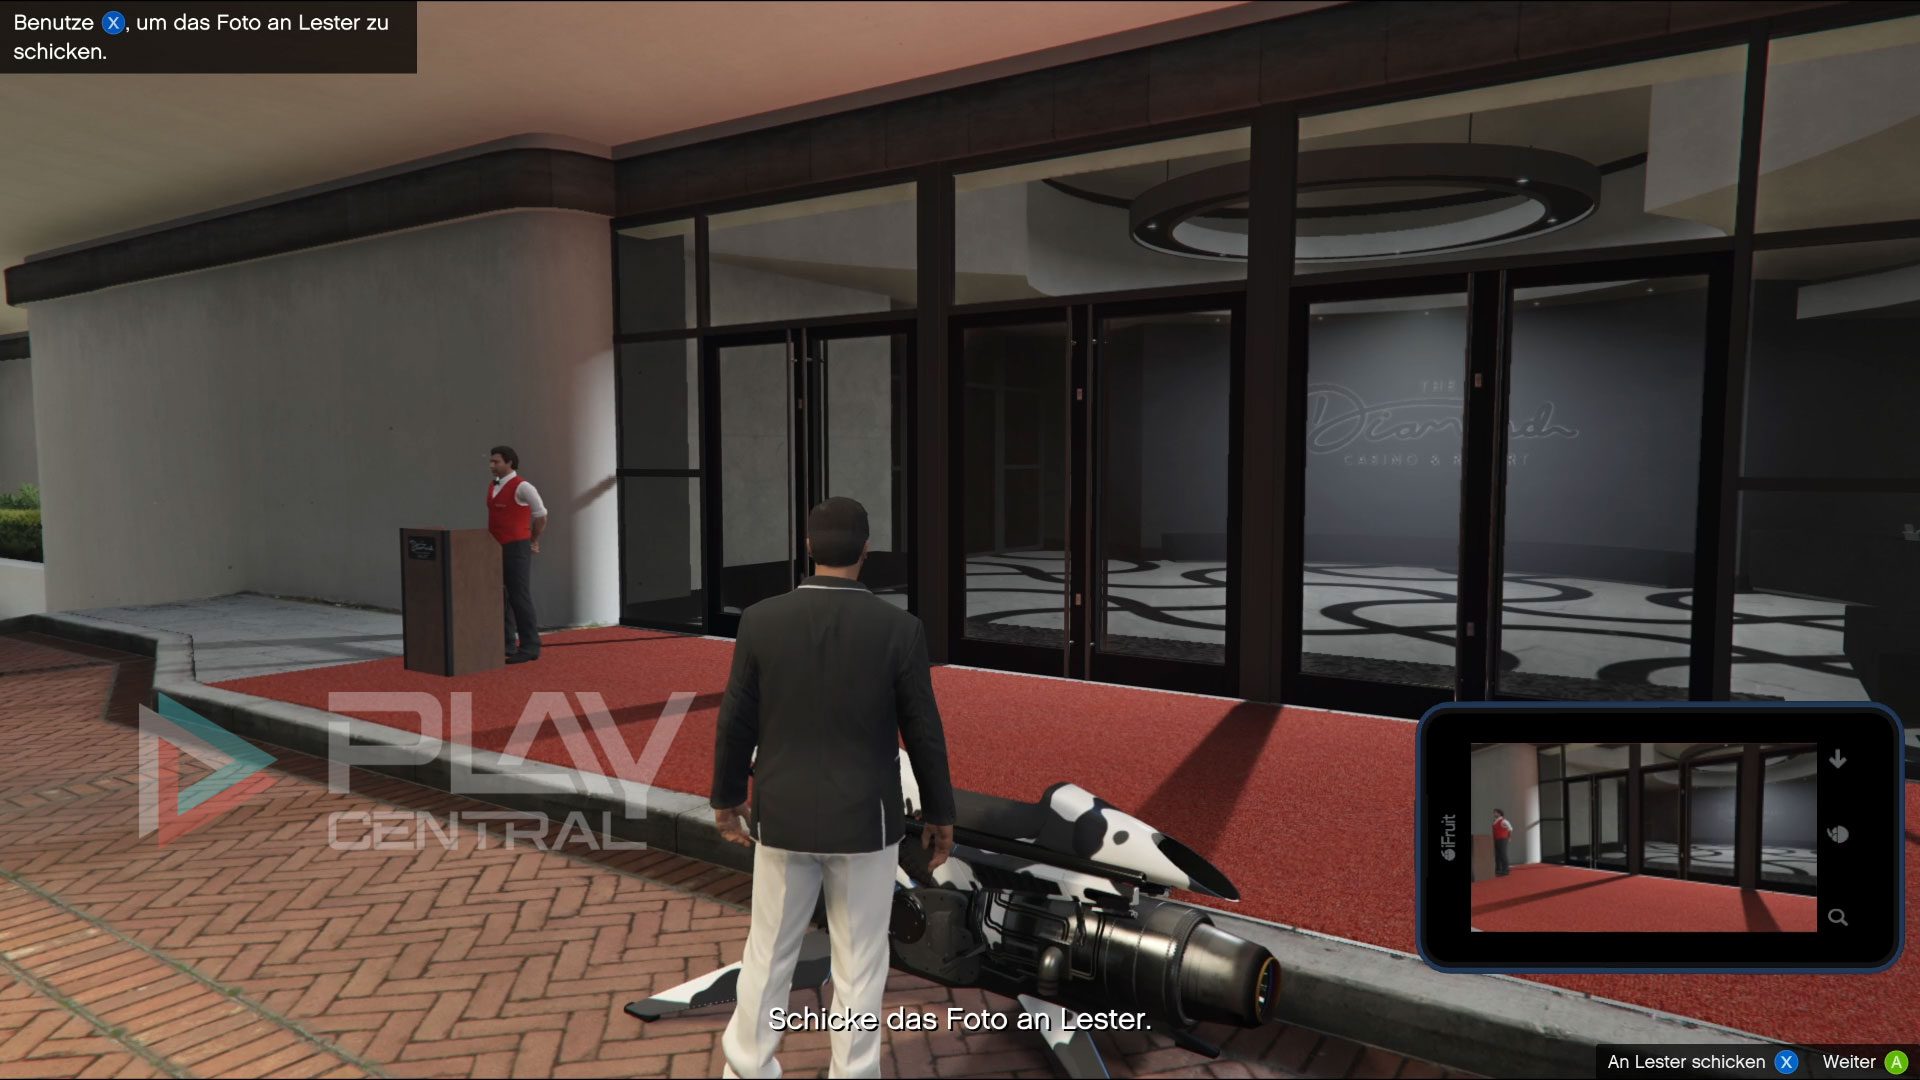
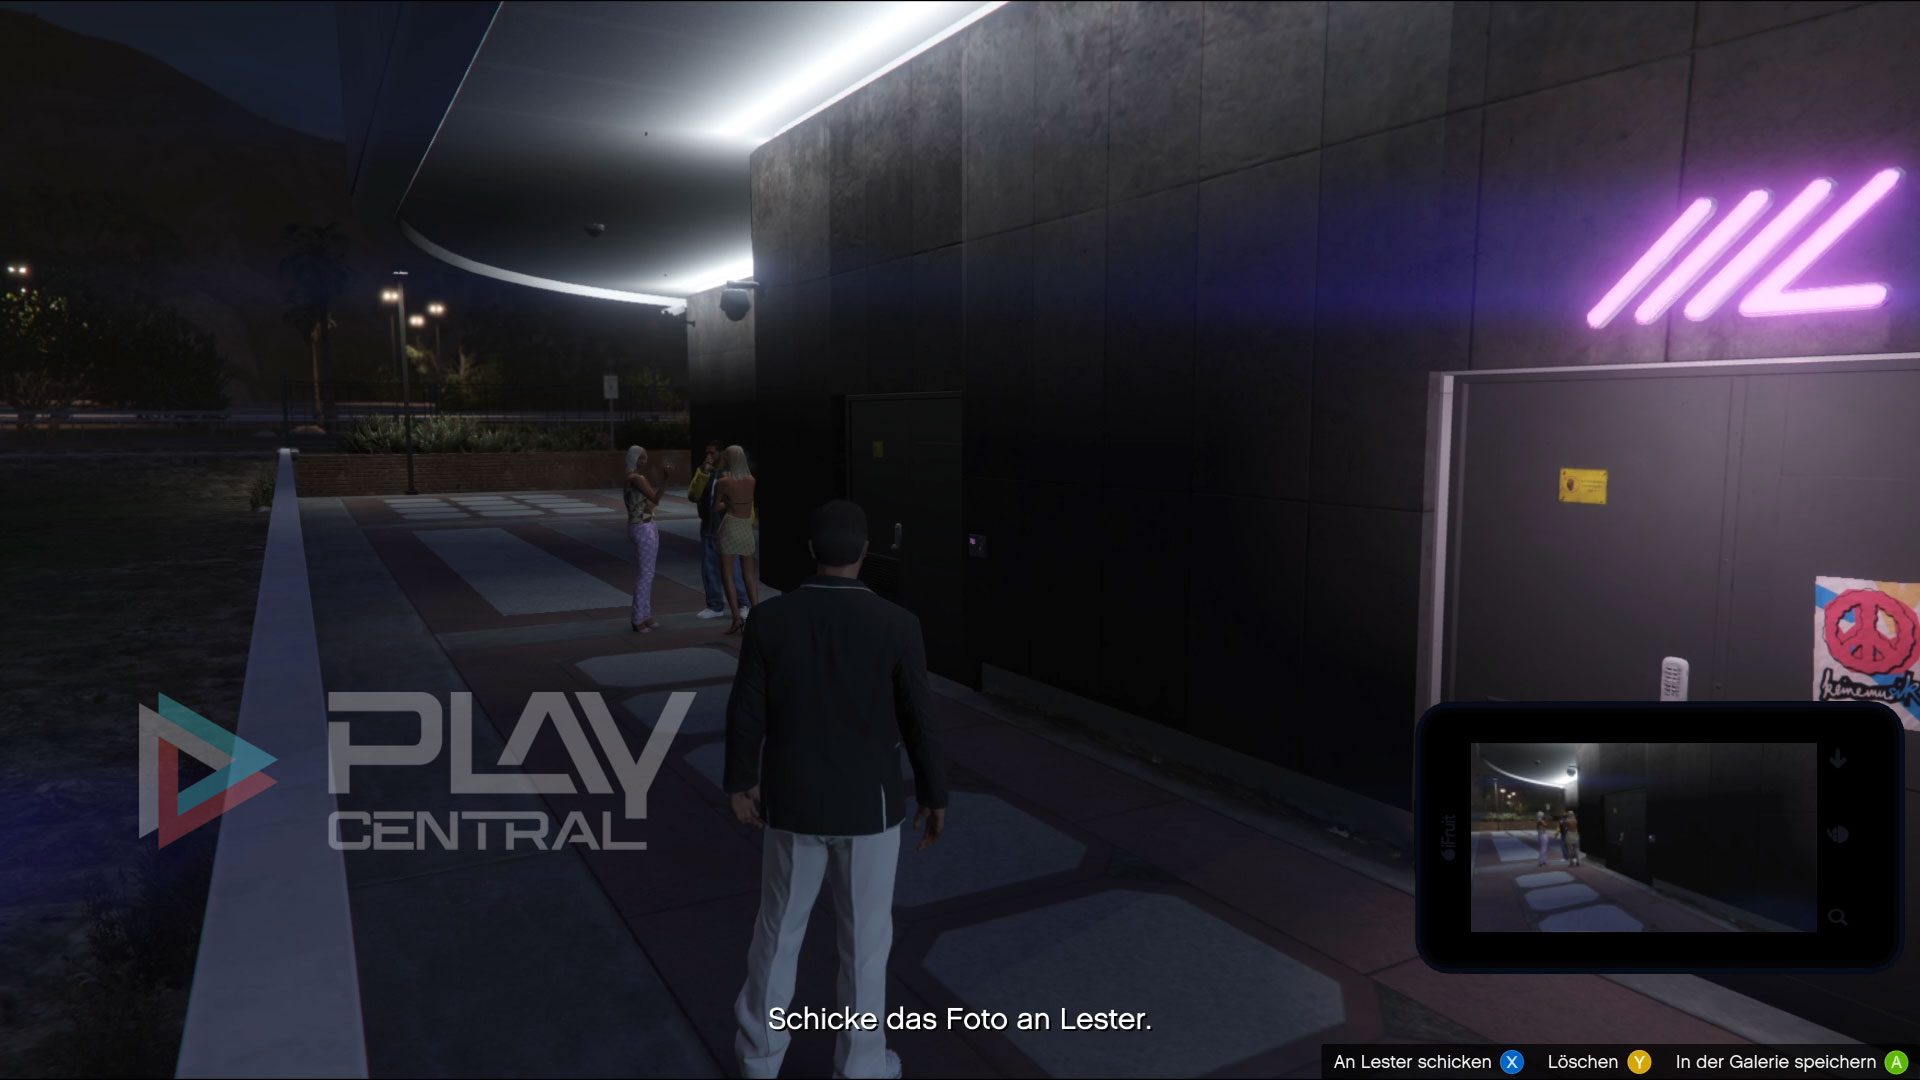
Now drive to the casino and take a photo of the main entrance with your Snapmatic app and send it to Lester. This is because the main entrance is the first access point to the casino.
You can spy on a maximum of six access points in total, but theoretically one such access point is enough for the heist.
The order in which you proceed is also up to you. Sometimes there are several entrances per category that you can scout out. Basically, however, a single entrance is sufficient for each access point so that it is marked on your preparation board and can therefore be selected as part of the actual heist.
- Main entrance
- Side entrances
- Roof terrace
- Roof
- Security tunnel
- Sewer system
Note: At a certain point, you will receive a message that the minimum amount required has been found out via the inside of the casino. You can then return at a later time to find out more.
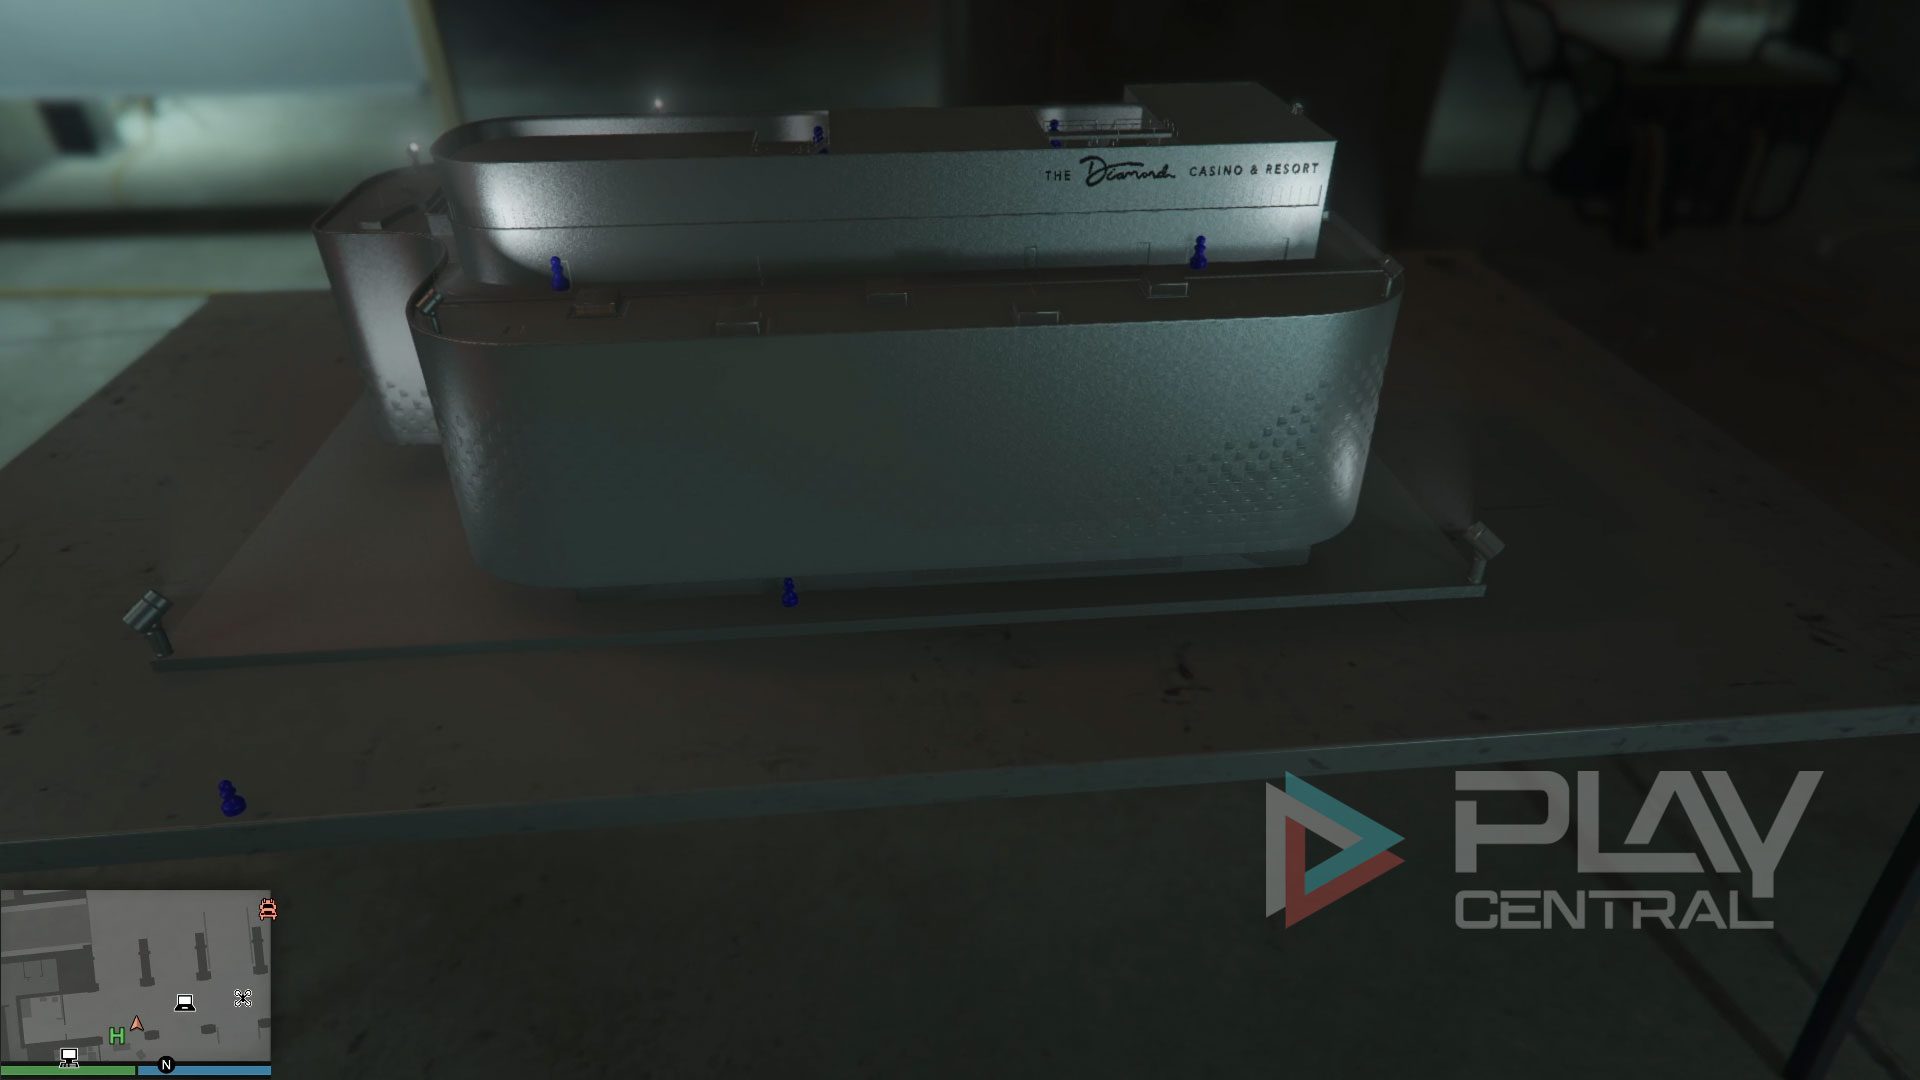
In theory, you can buy the casino model in the basement of your arcade for 130,000 GTA dollars. Once purchased, the model stands next to the three planning boards and shows you all the possible access points in and around the casino using small blue figures. Basically, you can save yourself the money if you already have an overview of the access points or are reading this guide!
Access point 1
- Main entrance access point: Take a photo of the three large glass doors through which you can enter the casino as normal. It’s also best to take a photo of the employee to the left of the entrance at this point. This is an obvious way inside, without much security and particularly suitable if you want to strike hard later during the actual robbery.
As soon as you have sent the photo, you will receive a small message that the main entrance has been successfully spied on.
Access point 2
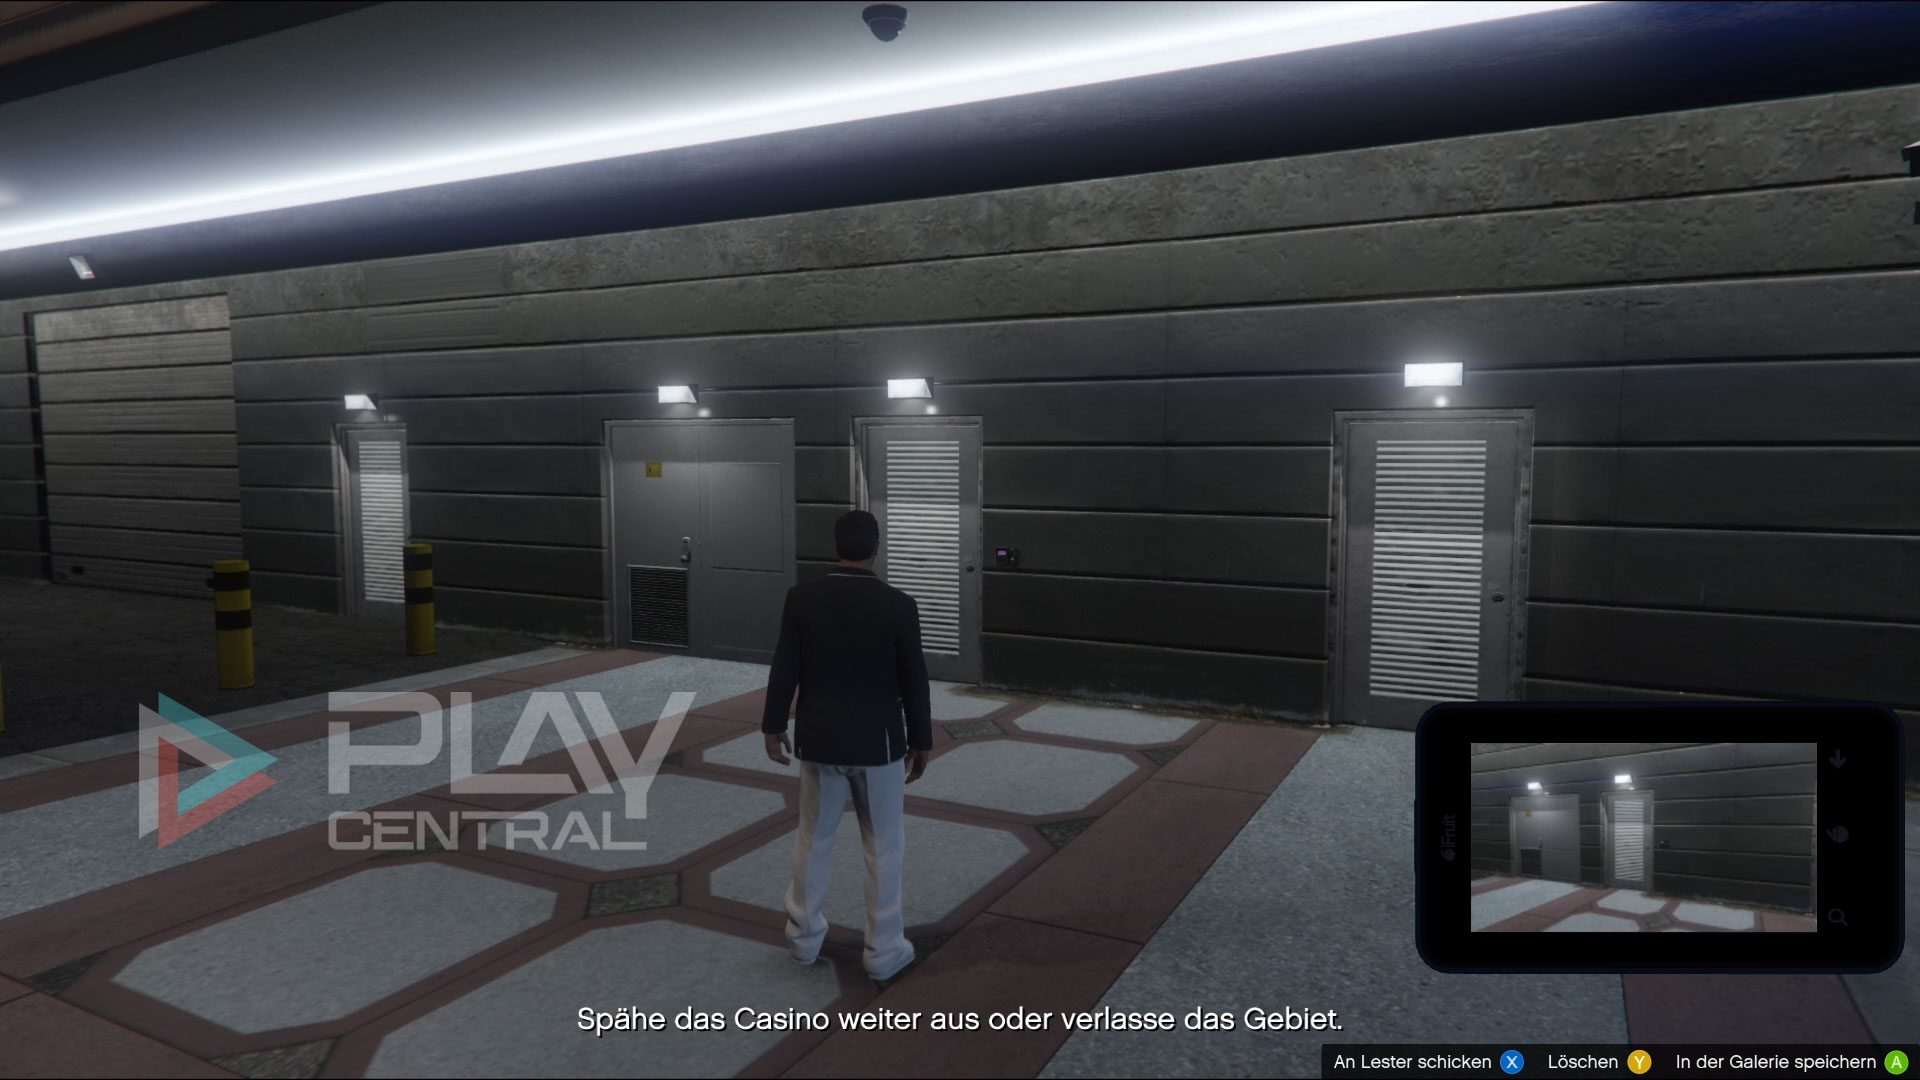
There are two side entrances outside the casino, but you only need to take a photo of one of them.
- Side entrance access point: On the opposite side of the entrance to the underground parking garage, you will find a side entrance with a keypad that you can photograph to unlock this access point for the Heist.
- Rear side entrance access point: At the rear of the building, you will also see a side entrance with a keypad. Take a photo so that this access point is also covered.
Access point 3
- Roof terrace access point / door with keypad no. 3: Take the elevator in the casino lobby up to the roof terrace to unlock the third access point. After a cutscene, walk past the lounge seats with the wall to your left. Shortly before the stairs, you will see the entrance to the roof terrace with a keypad on the left.
- Access point roof terrace / door with keypad no. 4: Now run around the corner to the left and then take a photo of the second entrance by the roof terrace, also with a keypad on the right-hand side.
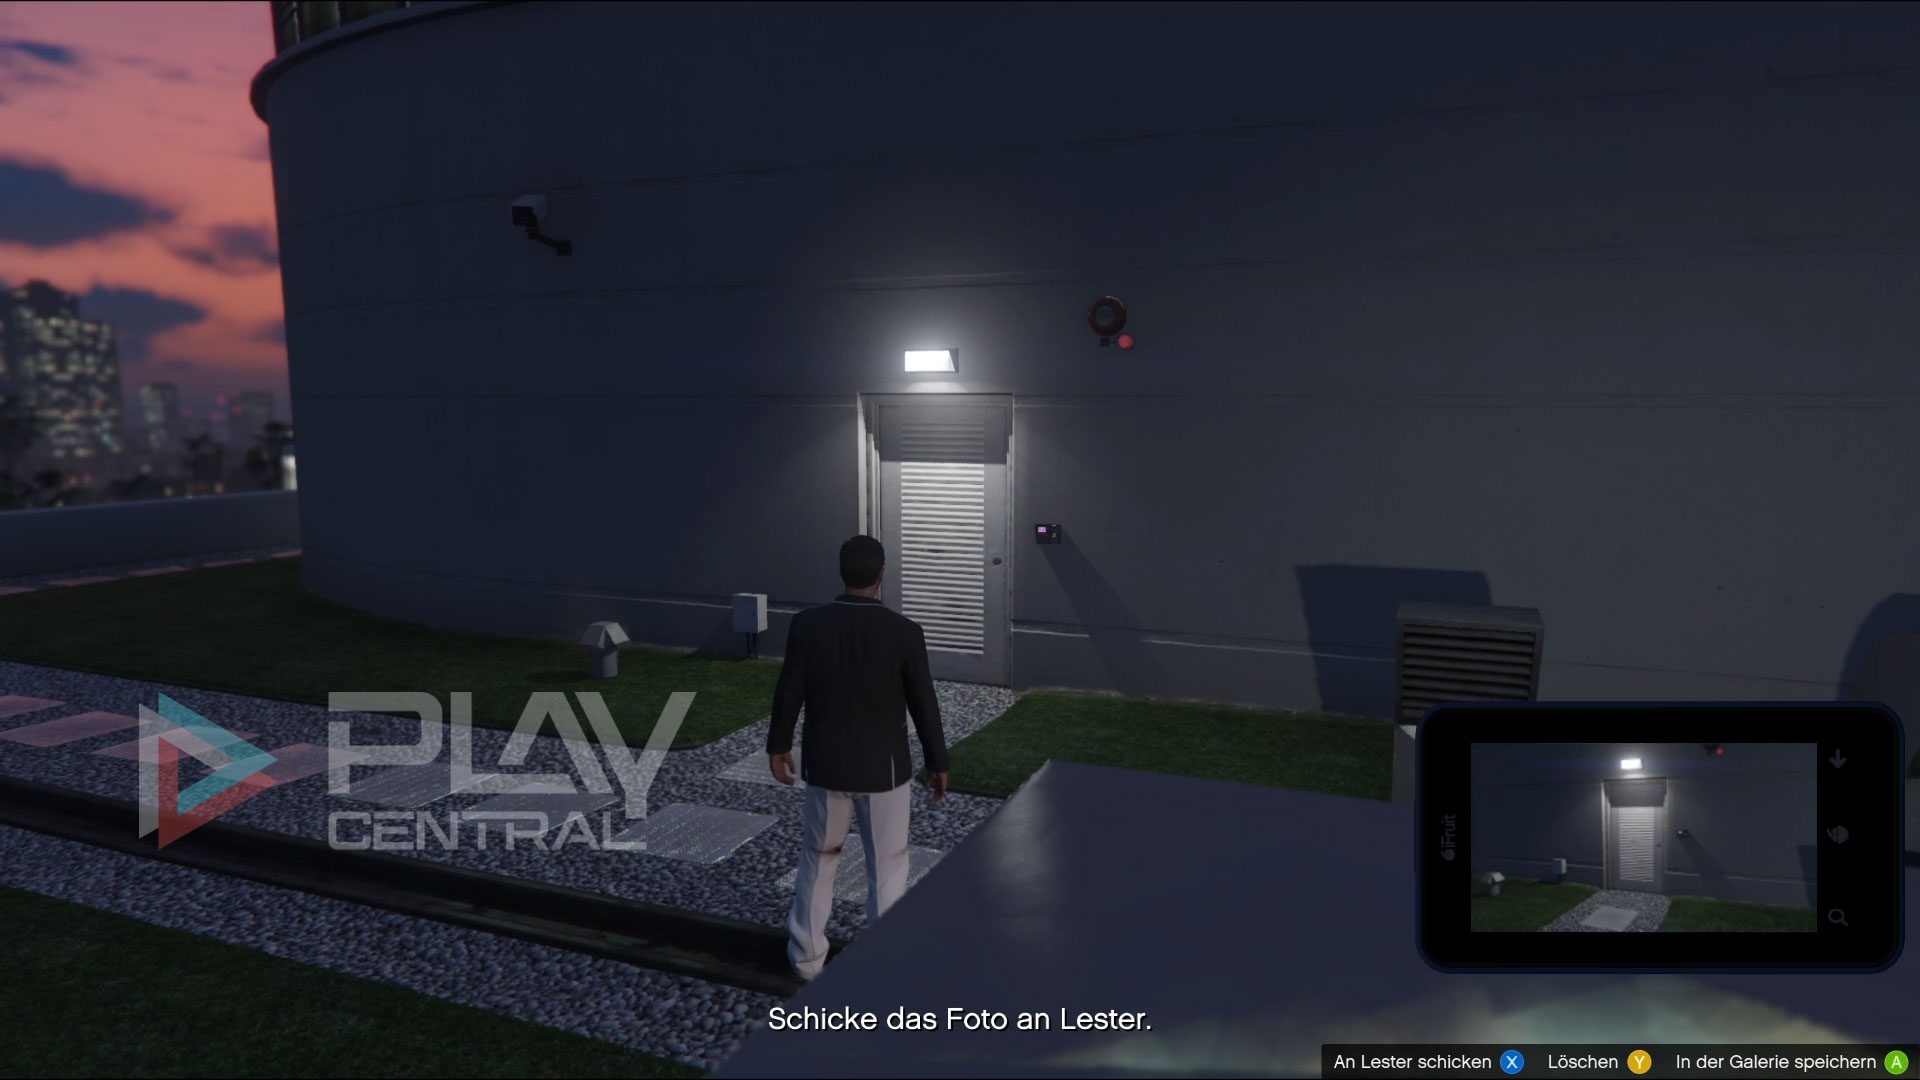
- Access point roof terrace / door with keypad no. 5: Run along the wall again until you reach the door where a guard is standing.
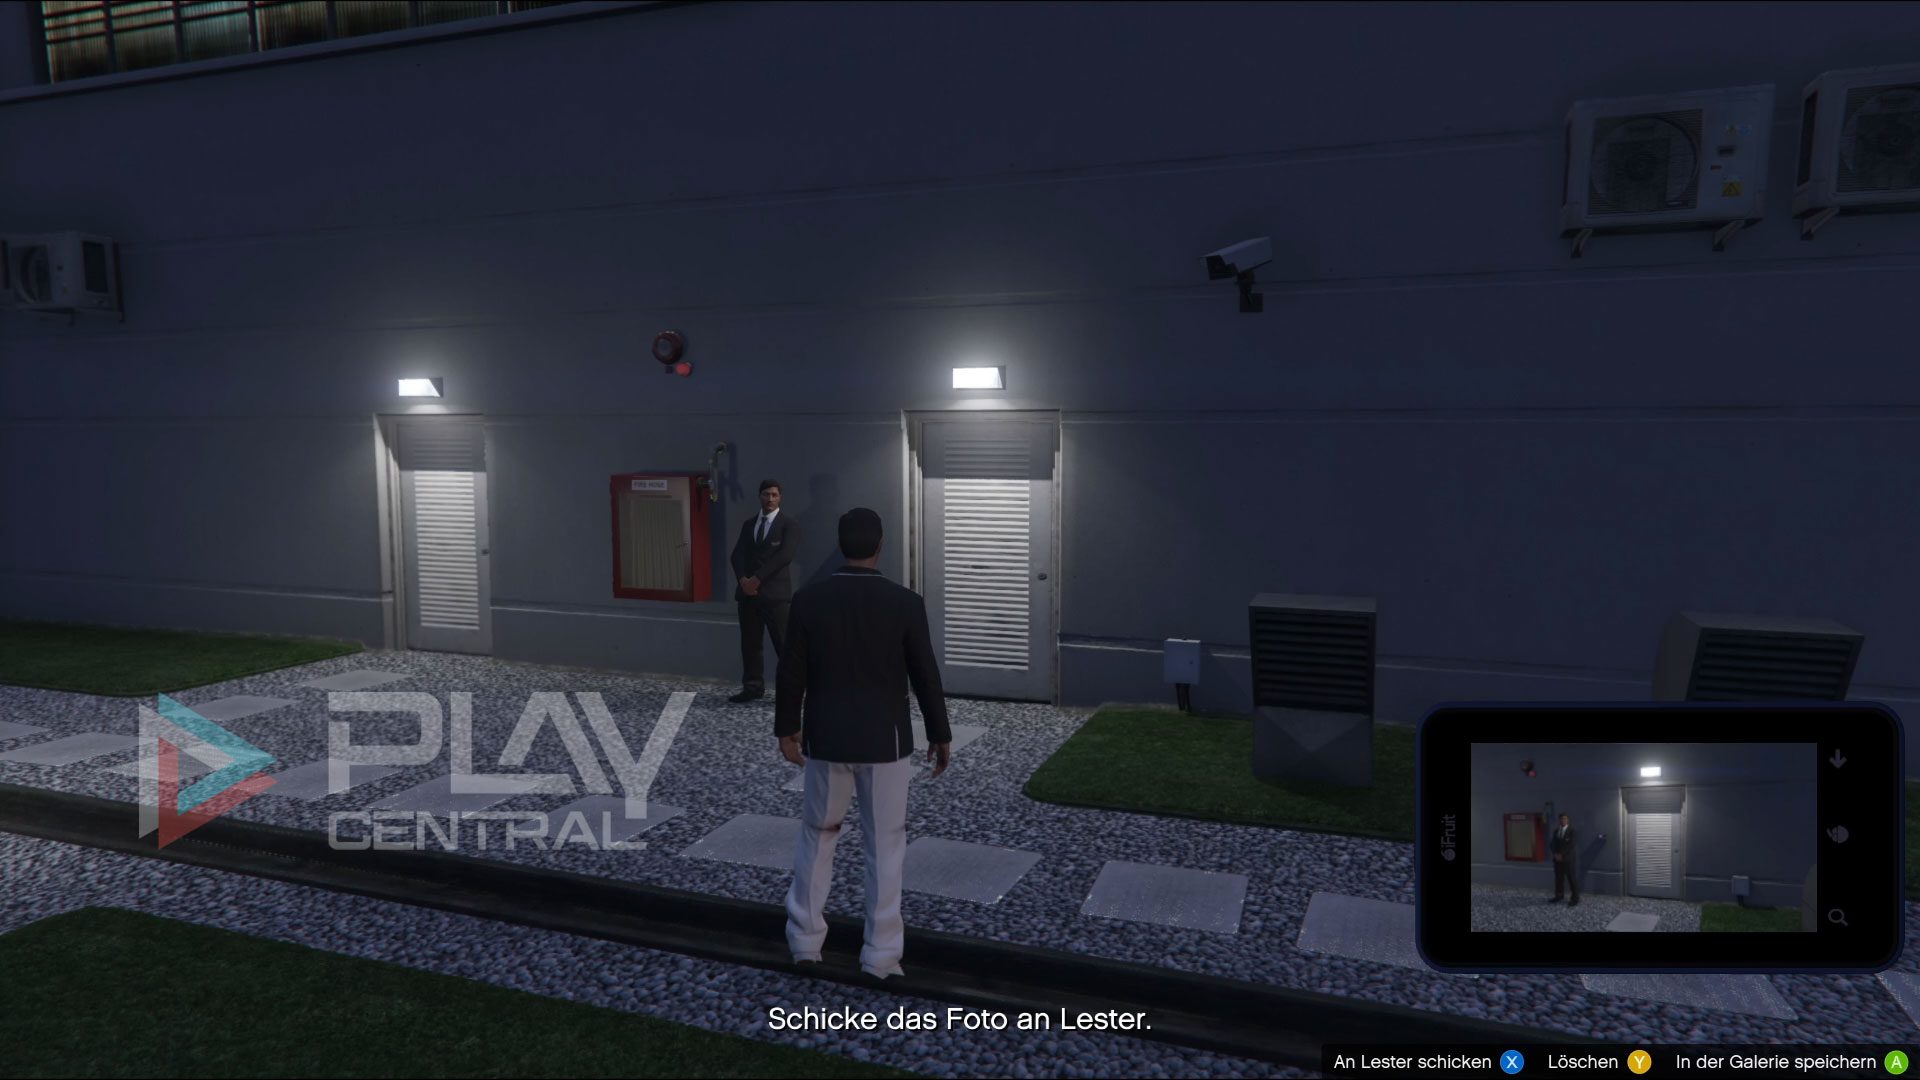
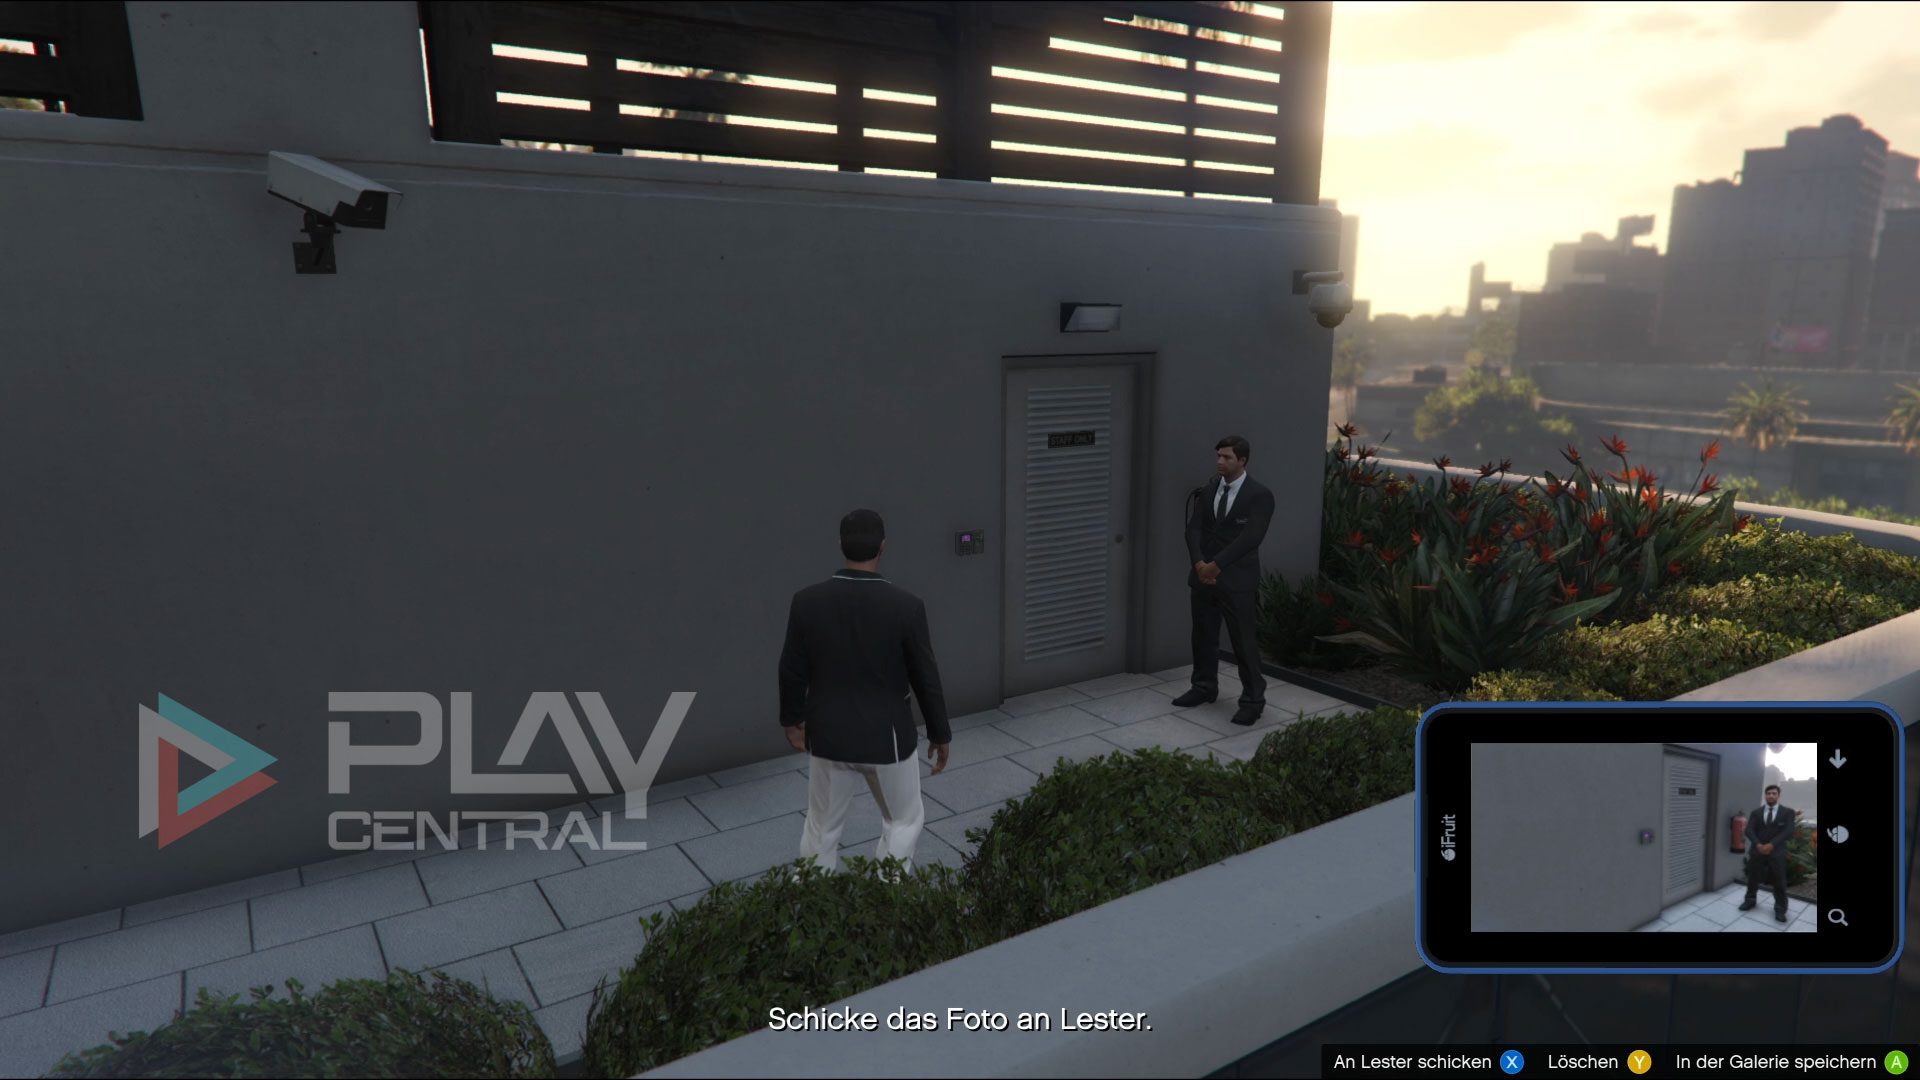
- Access point roof terrace / door with keypad no. 6: From the elevator, run to the right past the door to the penthouse and then down the stairs behind the counter. Then run directly to the left and towards the security guard. Between two surveillance cameras you will discover another door with a keypad, which you can photograph.
Access point 4
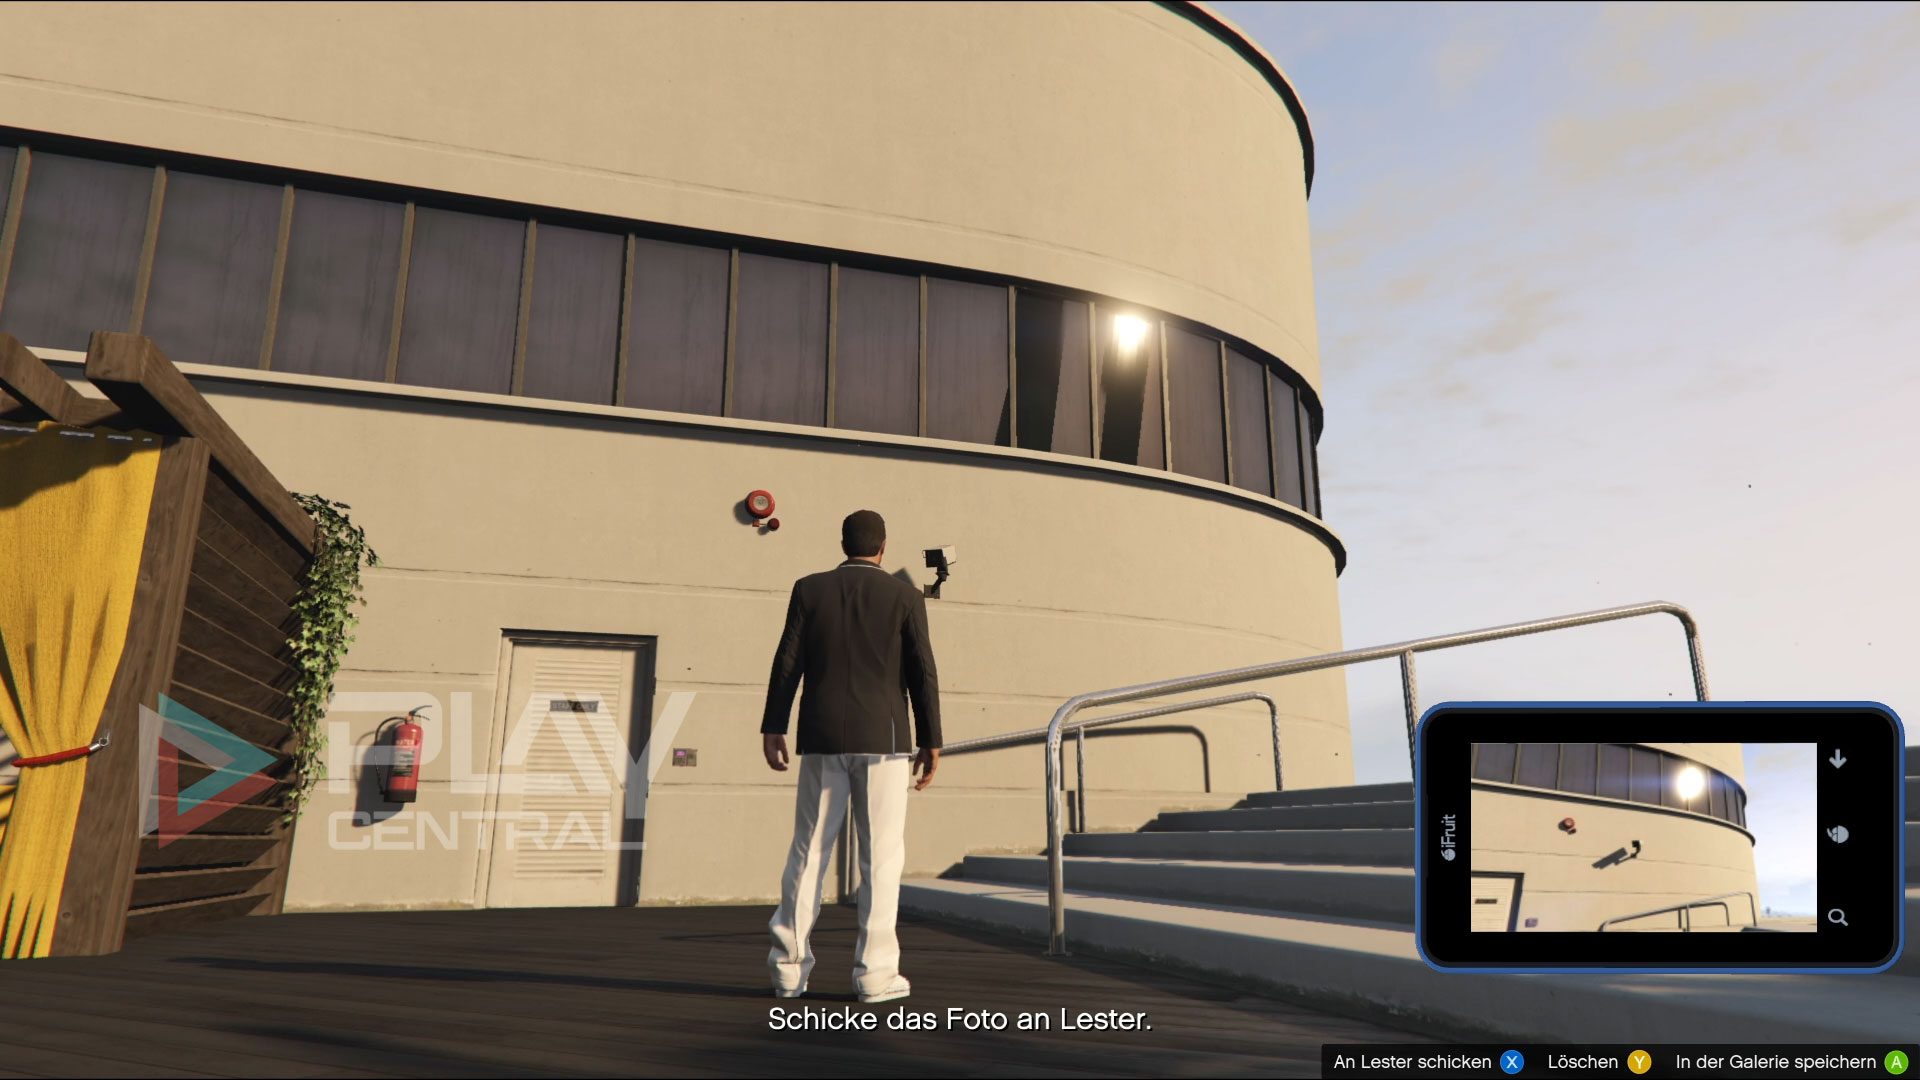
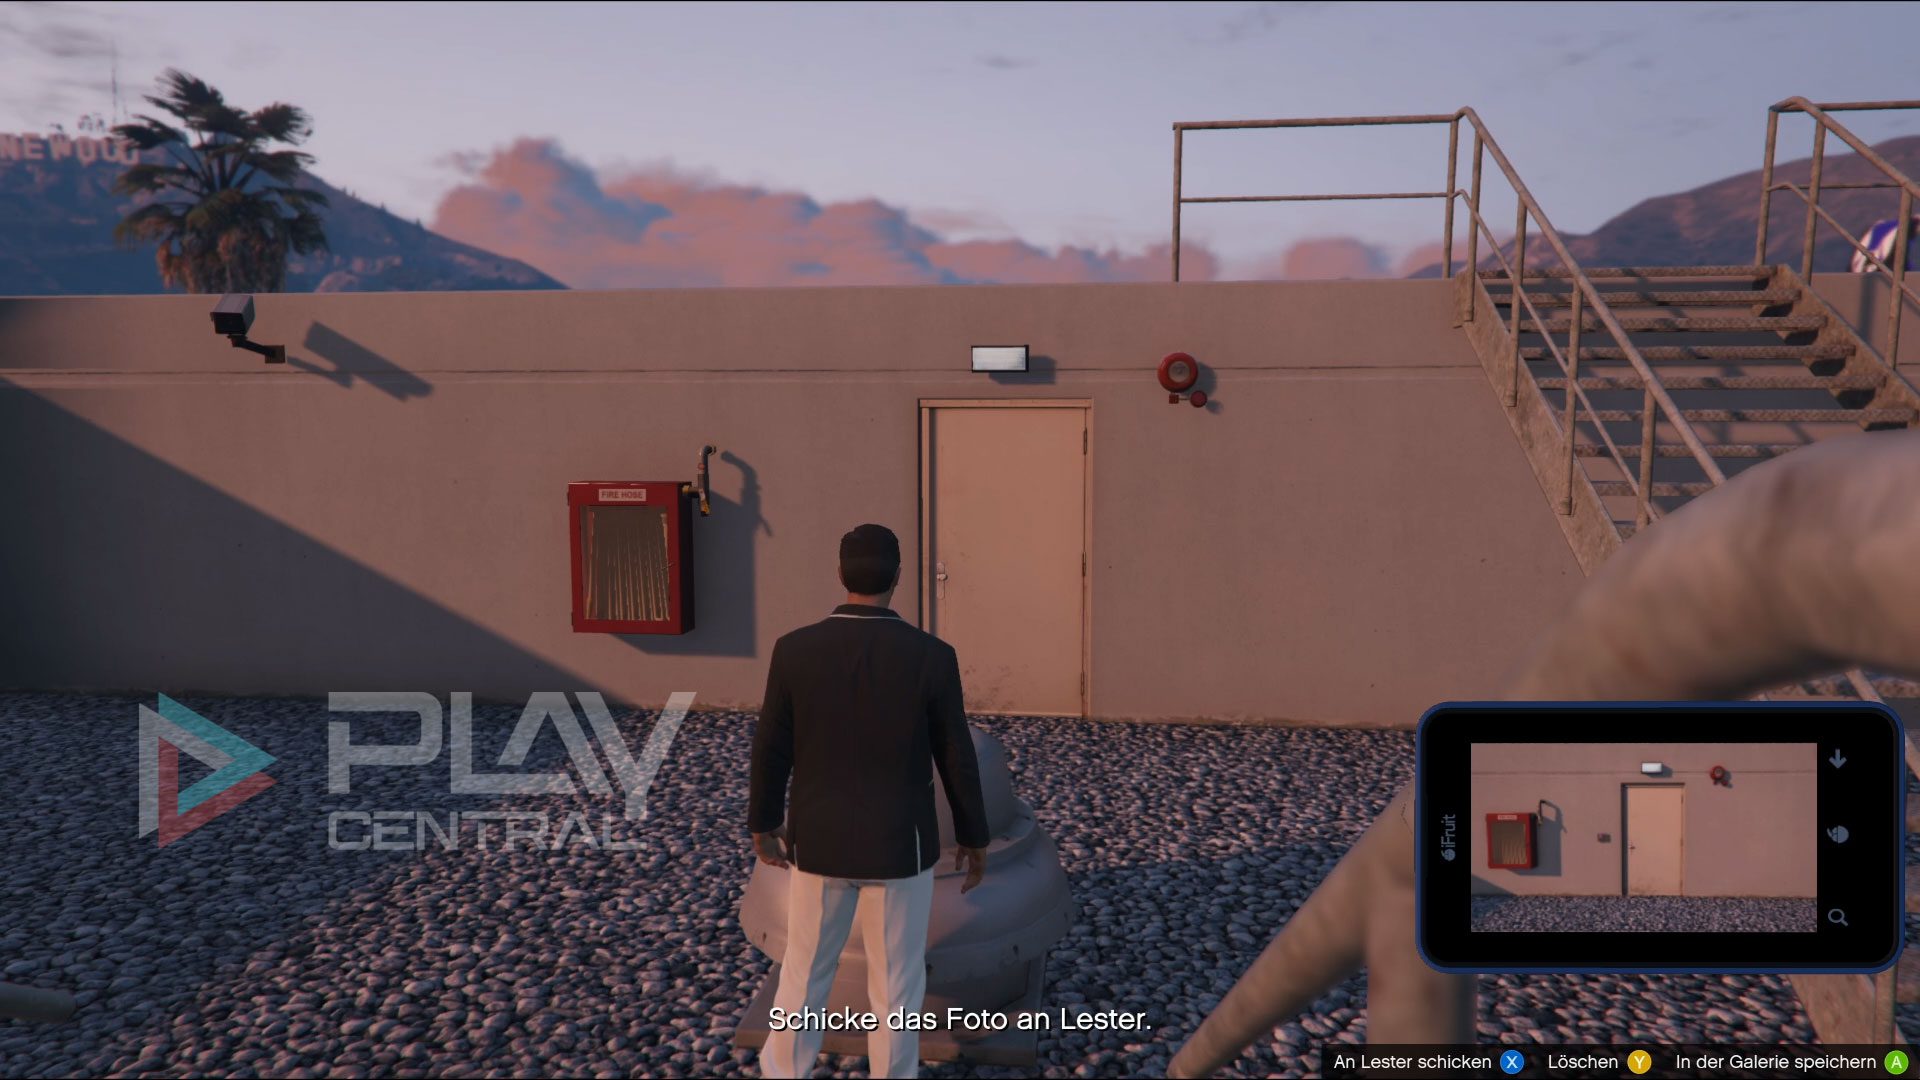
- Access point roof terrace / door with keypad no. 7: Run around the roof terrace and the rest of the building to the left and then climb the ladder to the top of the roof. The helipad is located here. Run across the roof and over the metal walkway. Behind the landing pad, go down the steps and you will find another door with a keypad and the entrance to the landing pad.
Access point 5
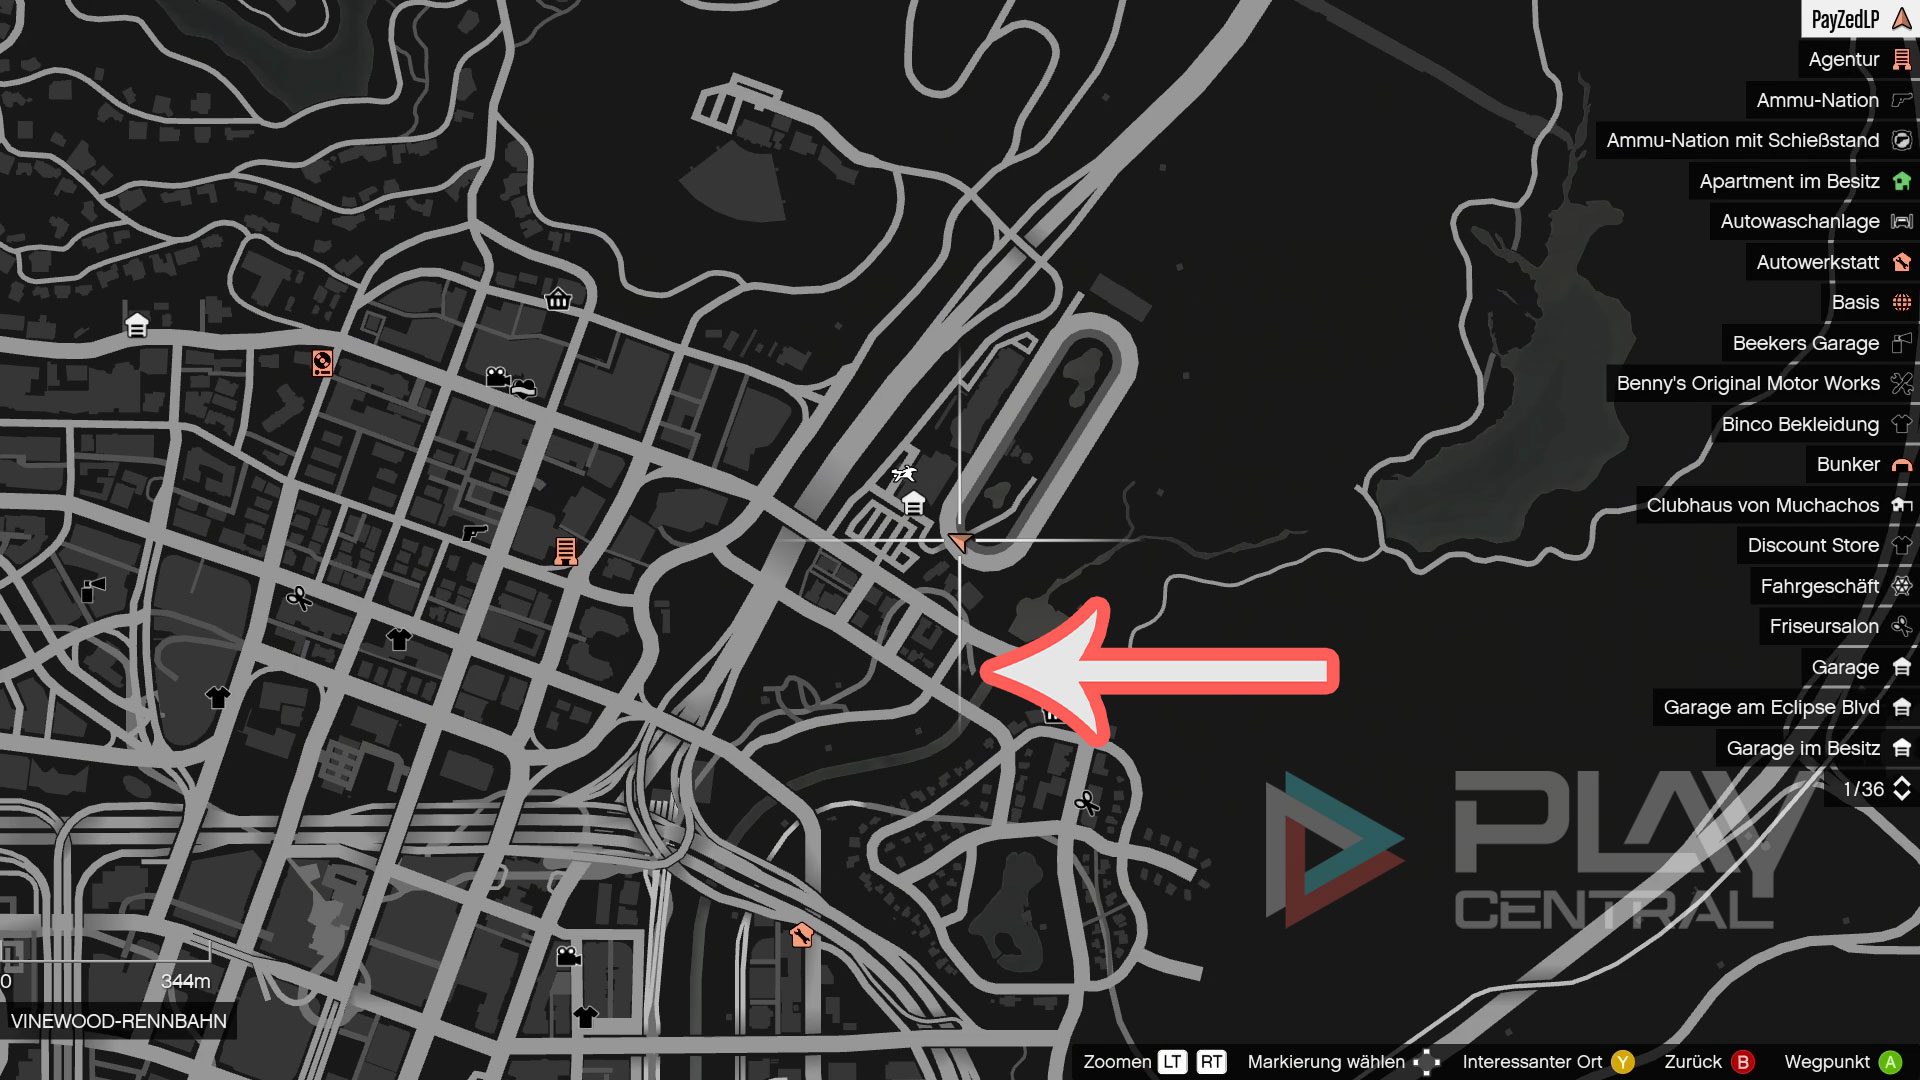
- Security tunnel access point: Leave the casino and head to the Vinewood Racecourse behind the building. On the right-hand side you will find a tunnel with a gate. Behind it is the security tunnel, which you can use to leave the casino later. You will also use this entrance to leave the gambling temple during The Podium Robbery.

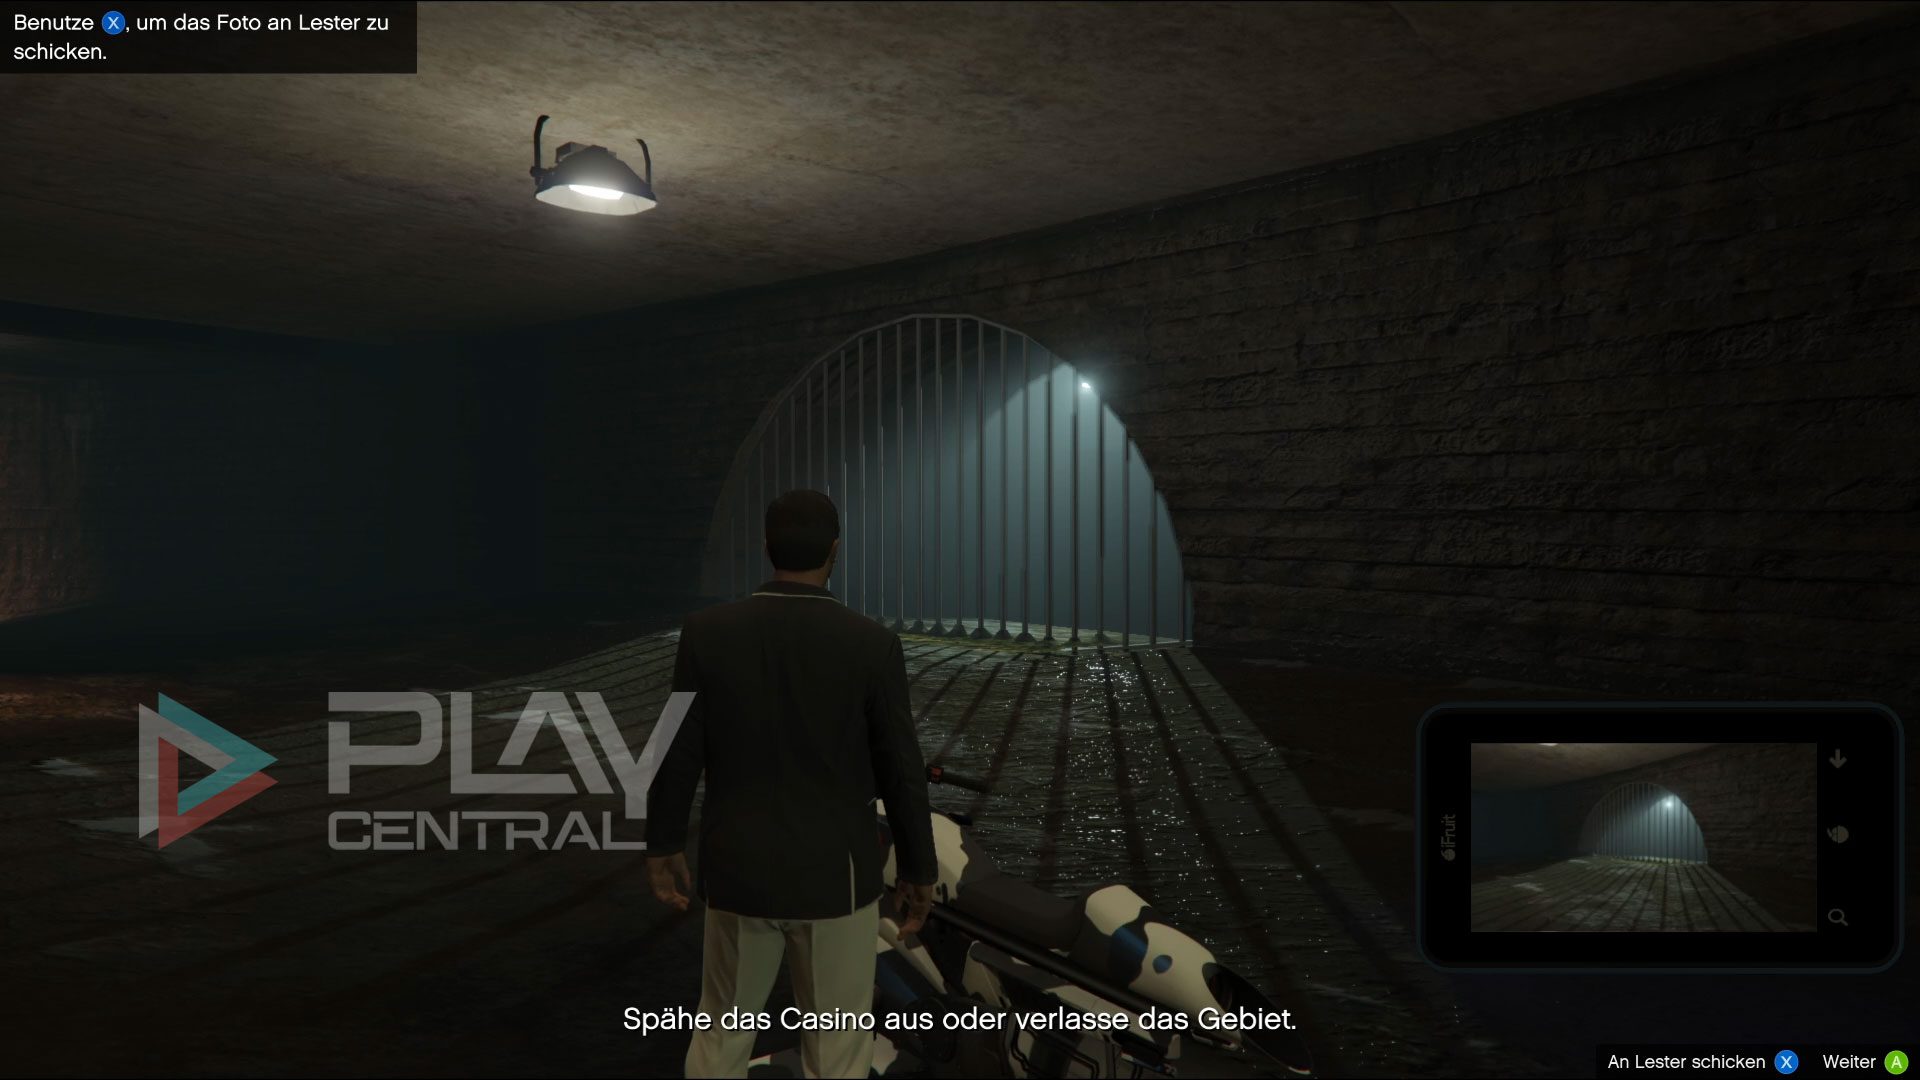
Access point 6
- Sewer access point: Behind the Vinewood racecourse, a stream flows into a large pond, behind which the Los Santos sewer system extends. Grab a suitable vehicle and drive into the canal. Then take the first entrance on the right to get into the sewers. Drive down until you find a gate on the right-hand side. Take a photo of it and send it to Lester.
Now go back to your arcade and you will see all the access points to the Diamond Casino & Resort that you have successfully spied out on the preparation board. If any are missing, the corresponding fields will still be empty.
You can repeat the casino reconnaissance mission before the Heist if you missed any access points or locations of interest on your first run.